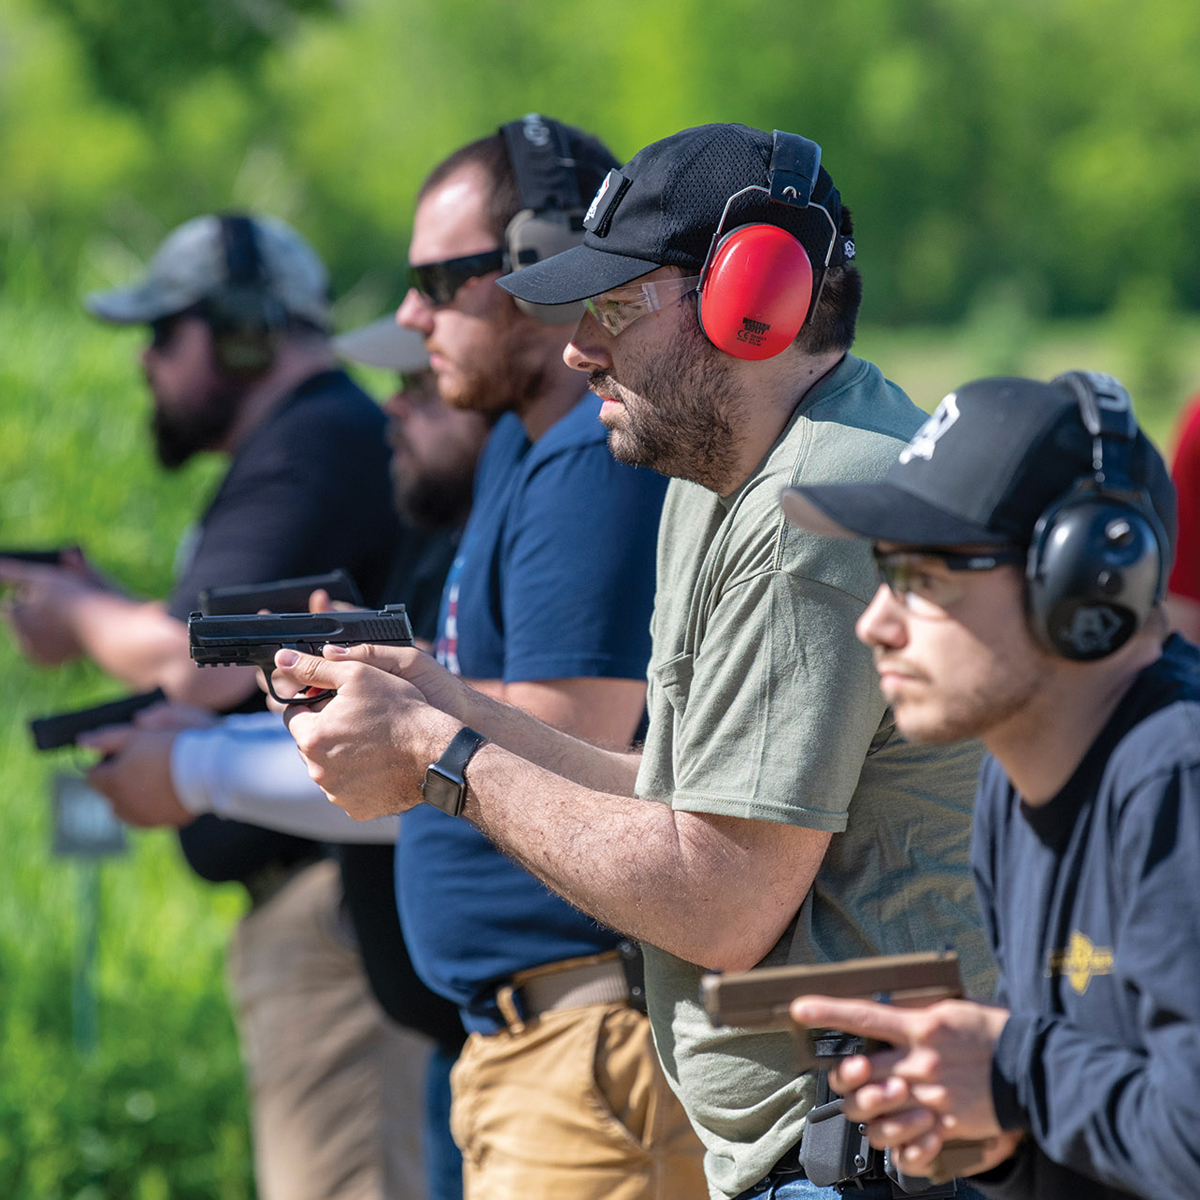
1. RUNNING THE GUN – THE TYPE 1 MALFUNCTION SEQUENCE
Yes, I totally understand that different instructors use different terms for what I am about to describe. I was trained to call this the “Type 1” malfunction. I have also heard it called a “Phase 1” malfunction. We are talking about a simple failure to fire. You have this type of malfunction when you press the trigger and get a click instead of a bang. On the range, that is an annoyance. In a gunfight, that can lead to you becoming ventilated — an outcome for which you are not likely hoping. There can be any number of reasons for the Type 1 malfunction: bad ammo, dirty gun — you name it. But don’t name it now. In a gunfight, we don’t care WHY the pistol malfunctioned; we only want to get that malfunction fixed as quickly as possible. Here’s how: Slap. Roll. Rack. So, despite your best efforts, you’ve ended up in a gun fight, meaning it’s already a bad day. You come up on target, press the trigger and get a “click” instead of a “bang.” Your day just got worse, and you need to make it better quickly or you’ll likely die. When the gun goes “click” instead of “bang,” first move to cover. Then take the following steps: Slap: Firmly strike the baseplate of your magazine to ensure the magazine is seated. Roll: Tilt your firearm to the right so the ejection port is pointing to the ground. Rack: Firmly grasp the slide, pull it all the way to the rear and let go. This sequence will ensure your ammunition supply is in the right place and should remove the unfired round from your chamber and insert a new round into the launch tube. Following this sequence, you may emerge from cover and get back into the fight. The best way to train for this type of malfunction is to buy several dummy rounds and go to the range with a friend. Have your friend load your magazines, inserting one or more dummy rounds. When you get to a dummy round, you will get a “click” instead of a “bang” and should immediately start your clearance drill. Do I need to remind you to keep the pistol pointed in a safe direction up in front of your face? Let’s look at the steps a little more closely. First off, we should know that most problems with autoloading firearms are magazine-related. If the magazine is not fully seated and securely in place, the slide will not strip a round off the top of the magazine and insert it into the chamber. I suggest shoving the magazine in firmly during every reload, but who knows what happened between the time you last inserted the magazine into your concealed carry gun and the time you need to draw that pistol in defense of your life? You could have bumped the magazine release. So start with the ammo supply. “Slap” that magazine firmly home. The “Roll” portion of this sequence should not be required, because your properly maintained pistol should eject the round when you yank back on the slide. But we are faced with a critical malfunction at an important time, so we are taking the extra step of ensuring that the unfired round (if one is in there) falls free of the chamber. Complete the Roll, just to make sure. Racking the slide should be second nature, but remember, there is a right way and a wrong way to do it. Reach across the top of the slide with all four fingers behind the ejection port and retract the slide briskly. When I say briskly, I mean yank that sucker hard. Then let go and let the slide go forward, driven by the recoil spring as John Browning intended. (I don’t care whose pistol you use; John Browning invented the recoil spring.) Now your pistol should be reloaded and ready to return to the fight. If it’s not, you have bigger problems. We’ll address those in the next sequence.
2. NOW WHAT? – THE PHASE 2 MALFUNCTION SEQUENCE
In the last drill, we talked about the Type 1 malfunction (that’s when you get a “click” instead of a “bang”) and how to clear it: Slap, Roll, Rack. The Type 2 malfunction is something a lot more pressing. You move directly to an alternative sequence if your Slap, Roll, Rack procedure does not work. Well, that’s not entirely true. The first step in correcting any pistol malfunction is to move to cover. If your pistol is not working, you had better not be working on that pistol out in the open. In fact, you had better not be fighting from out in the open, but if you are, at least have a gun that works. So, you suffer a malfunction and complete the Slap, Roll, Rack sequence. But upon returning to the fight, you find that your gun is still not functioning.
Here is what you do:
Step 1: Move to cover.
Step 2: Strip out the magazine.
Step 3: Rack the slide at least twice.
Step 4: Insert a fresh, fully loaded magazine.
Step 5: Rack the slide again.
Step 6: Return to the fight.
I wish there was a catchy acronym for that, but there is not. Take some time and memorize the sequence. After you move to cover, the Type 2 malfunction sequence begins with stripping out the magazine (because the magazine or ammo supply is usually the root of the problem). At the same time, when the magazine is out of the pistol, the slide will rack freely to help extract any fired brass or unfired round that might be left in the chamber. When you strip out that magazine, do so with authority. The reason for lashing out at the bad magazine is this: You might be suffering from a failure to extract and the resultant double-feed. That is where the fired round is not pulled from the chamber of the pistol and the next round in the magazine is pushed into the back of the shell case. This binds up the action. It also makes the magazine very difficult to extract. You need to hit the magazine release and yank down hard on the magazine baseplate. If that doesn’t work, you will need to pull the slide to the rear and use the slide lock lever to lock the slide open. As you rip out the magazine, you will likely notice a loose round bouncing around the chamber area and the magazine well. With the magazine out, the round can fall out through the well. Now rack the slide several times to make double (and triple) sure any round left in the chamber is extracted. Grab a new magazine, insert it briskly and rack the slide to chamber a live round. You may now return to your previous lifesaving activities. If, after running the Type 2 malfunction sequence, your pistol still does not fire, you have two choices: If you live in an area where it is legal, you can reach for your backup gun and press the fight. If you are without said backup gun, bail out. Flee. Cut and run. You are out of the fight, and your pistol needs more work than an immediate-action drill can provide you. Run this sequence until it is burned into your memory. This is a skill you will only need under the direst of circumstances. At that point, you want the movements to be automatic. So stay safe and train hard.
3. LOOK/SHOOT WITH A TWIST
Move your eyes and then move your gun. The goal of the “Look/Shoot Drill” is to teach you to quickly engage multiple targets. That can also mean multiple target areas on the same aggressor: two to the chest and one to the head, for example, popularly known as the “Failure to Stop Drill” or the “Mozambique Drill.” To do this correctly, you must focus on your first target, shoot it, move your eyes to the second target, then move your sights to the target you just focused your eyes on and shoot that. The reasoning behind this is simple: If you move your gun while your eyes are searching for your target, you will swing right past it. I don’t care how good you are. If your eyes are moving, your hands will be moving. When your eyes stop, your hands will stop. So, start slow for form because, say it with me, “Slow is smooth. Smooth is fast.” Here’s the deal: Take your target — one that ideally contains different shapes, colors and numbers (or multiple target areas) — and hang it up about 4 yards downrange. Then have your shooting partner call out random combinations of letters and shapes, like “A, B” and “circle, A” and so on and so forth. Look at the first target. Shoot it. Keeping your gun pointed at the first target, look at the second target. Now move your gun and shoot the target. You can, if you wish, draw your own targets. Better yet, use two target stands about 10 feet apart. This really forces you to look first. When you have to move the gun that much farther, if you don’t look first, you will swing way past the target and miss every time. After you practice a few times, you can start to build your speed. Remember: It is called the “Look/Shoot Drill” because you look first and then you shoot. After you have the mechanics down, break out the shot timer.
4. …AND ONE TO THE HEAD
The first complaint about small-caliber handguns is their lack of “stopping power.” I’m only going to step lightly into the raging debate over caliber choice by saying two things: Carrying any gun is better than carrying no gun, and most criminals won’t wait around to see what caliber you’re firing at them. I say “most” because there is always the possibility that you will run into that fabled “determined attacker.” If you meet such a predator, you want accurate defensive fire in order to stop the threat as quickly as possible. Come to think of it, you should want accurate defensive fire on all occasions. So this drill becomes not so much a shooting lesson but rather an anatomy lesson. You want to put your bullets into the places that will shut the bad guy down as quickly as possible. The traditional “Failure to Stop Drill” has the shooter firing two rounds to the chest and one to the head. Sadly, Hollywood has programmed people to think that a bullet causes instant death and that a bullet to the head — anywhere in the head — is like a thunderbolt from Zeus. Nothing could be further from the truth. Do you remember the old riddle? “What does a man do after being shot with a pistol? The same thing he was doing before he was shot with a pistol.” When I was in the Navy, a friend of mine was shot in the head with a .45 ACP. He is fine. He was up and about in time to testify at the bad guy’s trial. So the key elements to stopping a bad guy are bullet placement and penetration. If you don’t believe me, ask the FBI. They have a penetration standard for a reason. We can add sequencing to that short list of important elements. Let me explain. If your first two shots don’t really have the desired immediate effect, you might want to try something different. Hence the phrase: “Two to the chest and one to the head.” Two shots to the chest will often have the desired effect on a bad guy … but not always. And a human being can be shot right through the heart and still have enough f ight left in him to get off a couple rounds. If one of those rounds hits you, I don’t care how good your shooting was, you lost the gunfight by virtue of getting hit. If you are looking for the fastest stop possible, you might want to train up on the “Failure to Stop Drill” — the aforementioned two to the chest and one to the head. Doing this correctly requires a couple important elements. The first is knowledge and understanding of human anatomy. The chest shots are not supremely effective unless the bullets hit the heart or the central nervous system. The same is true for headshots. There is a very small target area that will give you the desired effect. You are looking at a 6-inch circle in the upper chest and basically a 3×5 card across the eyes. These two targets are then connected with a 1.5-inch-wide band that represents the spinal column. Put bullets into these areas and you will stop your attacker very quickly. To run this drill, draw from the holster, step off the “X” as you shout “Stop!” and then fire two rounds into the chest target area followed by one to the head target area. If you need help, review the “Look/Shoot Drill.” Those skills apply here. This drill just adds the extra element of anatomy. Start slow for form. Focus on safety and mechanics before you attempt to pick up speed. Slow is smooth. Smooth is fast. Make it happen.
5. PUTTING IT ALL TOGETHER – DRAW, SHOOT, RELOAD, SHOOT AGAIN
You might have heard of the “El Presidente Drill,” a sequence designed by Col. Jeff Cooper as a result of some obscure criminal action in Latin America. In that drill, the shooter started with his or her back to three targets, turned 180 degrees, engaged the targets with two shots each, reloaded and engaged the targets again. Here endeth the lesson. For our purposes, we will remove the 180-degree turn. Begin by facing the targets and, on the command “Fight!,” engage all three targets with two rounds each, reload and then engage all three targets again with two rounds each. (Some people call this “The Vice-Presidente Drill.”) Of course, we have rules. The first rule is to load your magazines with more than six rounds. This is in case you miss. Remember, only hits count. You revolver shooters, well, bring extra speedloaders or don’t miss. You’ll engage each target with two rounds before moving to the next target. You can shoot a controlled pair or you can shoot a double-tap. This is not to presume that a double-tap offers a lack of control. The difference between a double-tap and a controlled pair is the speed with which you fire the follow-up shot. With a controlled pair, you will allow the sights to settle after the first shot and obtain a clear sight picture before firing the second shot. On the double-tap, you touch off the second shot as soon as you have your rudimentary “flash” sight picture back on target. It’s not quite as accurate, but it is much faster. Step 2 is to look at the next target. Remember how I explained in the “Look/Shoot Drill” that you look first and then move your gun to where you are looking? Don’t try to move your gun until your eyes have focused on the target. Doing so will typically cause you to swing the pistol past the target, wasting valuable time or causing a miss. After your eyes are on the target, move your gun and fire your two rounds. Now do that again. Look first, then shoot. This brings us to the end of the first string of fire and the reload. Whether you are shooting a revolver or an autoloader, the first step is to bring that pistol in close to your body at about neck level. This is your reloading workspace. If you try to reload with your arms extended, you will be slow and inept. If you drop your hands down to your waist, you will be forced to take your eyes off your adversary. In a fight, taking your eyes off the bad guy is a bad thing. So get your gun close in at about neck height so you can stay focused on the bad guy but still use your peripheral vision to kind of see what you are doing to the pistol. With enough training, you should be able to reload automatically. If you are using an autoloading pistol, get a firm grip on your new magazine before you drop the “spent” magazine from the gun. I’m suggesting you do a speed reload here. Don’t try to catch the old magazine and stow it for later use (a tactical reload); just get your gun up and running to get back into the fight. Here is where some people will argue with me. If you are shooting a pistol and loaded more than six rounds into the magazine and you scored hits with all of your f irst six shots, you will have a live round in the chamber during your reload. After you insert the new magazine, I suggest you rack the slide. Right now, more than half of you are saying, “But why? You’re dumping a live round out on the ground!” Yes, you are. But you are also ensuring that you have a live round in the chamber of your firearm, and that is more important than the round you dumped out on the ground. Some of you will disagree with me. That is fine. We have all had different training. I suggest you rack the slide after EVERY reload because you have just seated a fully loaded magazine and racking the slide guarantees your pistol is ready to roll. After you are reloaded, the look/shoot sequence begins again. Press out to full extension, look at the target, then bring the gun to bear and shoot twice. Then do it two more times: Look/shoot. Look/shoot. And now the stage is clear. There has been some question over the years as to what the “El Presidente” or the “Vice-Presidente” is all about. Here is my take: It is NOT about making you think that you can take on three armed attackers and win the gunfight. If you try it in a force-on-force scenario, you will take a bunch of hits before you get through the first string of fire. In the words of Forrest Gump, “That is a bad thing.” Instead of looking at this drill as training you to be Jason Bourne, look at this drill as a means to combine several elements of your pistol training into one event. Doing so requires you to focus on each element individually while putting it into action in the correct order. It is, in effect, training for your brain. You need to think in sequence about everything you are doing, and you need to do everything correctly and in the proper order to get your rounds on target. As always, start slow for form. Work the sequence, performing every element correctly before you try to pick up speed. Slow is smooth and smooth is fast. The speed will come. When you get to the point where you are picking up speed, work hard to maintain focus on the mechanics and you will see great improvement.
6. TURN AND SHOOT – TAKE IT ONE STEP AT A TIME
Very rarely will your threat ever approach you directly from the front, yet consider how often we train by only addressing threats directly in front of us. Most firearms training is done statically on a firing line. Occasionally, shooters will engage from behind simulated cover. Even less often, people will actually move to cover before shooting. So let’s start with the simplest of movements on the firing line: Turn and shoot. As with any shooting drill, work this one slow for form and get the movements right before you try to pick up speed. Slow is smooth, and smooth is fast. Here’s a breakdown about how this drill should work. We are assuming you are a right-handed shooter with your pistol on your right hip. You can adjust the drill accordingly if you are a left-handed shooter.
- STARTING POSITION – Standing perpendicular to your target, you’ll start with your left shoulder facing downrange. Assume a ready position. On the command, turn your head to the left to acquire the target while at the same time acquiring a firing grip on your firearm in the holster. Do not draw at this time.
- FACE THE TARGET – To turn to face the target, the goal is to keep your right leg largely stationary. To do so, take a step backward with your left leg and pivot. This is done with your right hand in a firing grip on the pistol while it is still in the holster. Only after you are facing the target should you perform the standard four-step draw, bringing your gun on target to fire.
- COMBAT SCAN – Immediately after any shooting incident, you should perform a combat scan. Look around: left, right, up and down. Look behind you. Only if the area is clear of other threats should you re-holster. This combat scan will be standard in all training drills before re-holstering, so get used to doing it.
WHY WE DO IT THIS WAY – The “Turn and Shoot Drill” is so named because you must turn first and then shoot. The best way to accurately put your rounds on target is to establish a solid platform and get your front sight on the target. Shooting stance isn’t the most important thing in a gunfight, but a good stance will help you keep your front sight where it belongs. Do what you can to establish a good stance; that means squaring up to your target. Static, straight-ahead shooting drills are essential for beginners, but for mid-level concealed carry training, movement must be introduced to your practice. Remembering to keep your strong-side foot stationary will make for a stronger shooting platform and result in better groups.
SLOW FOR FORM – This sequence is to be performed slowly and repeatedly until you master the sequence and it is firmly ingrained in your training protocol. Count the steps out as you work through them: The first movement with your head is to acquire the target because your body will follow where your eyes are looking. You do this with your hand on your gun to save time during the sequence and to reduce any fumbling for your gun as you pivot. Like I mentioned, the goal is to execute that pivot while attempting to keep the gun as stationary as possible. That is why the strong-side leg is to remain in place. That means if you are a right-handed shooter dealing with a target off your left shoulder, you look at the threat, establish a firing grip and then take a step backward with your left foot, allowing you to pivot on your right foot to face the target. If you are right-handed and your target is off your right
Step 1: Look; acquire the grip.
Step 2: Step to pivot.
Step 3: Draw/engage.
Step 4: Combat scan.
Step 5: Re-holster reluctantly.
After you are doing these steps in sequence without really thinking about them, you can begin to increase your speed. I’ll say it again: Slow is smooth and smooth is fast. Remember, very rarely will a threat approach from dead ahead. This is a skill you need to master in order to improve your effectiveness in a deadly force situation. Stay safe. Train hard.
7. TRAINING FOR THE SPEED RELOAD
I don’t care who you are; when bullets start flying, you will want more going away from you than coming toward you. Yes, accuracy is important. Only hits count. You are responsible for every round that goes downrange. But when it comes right down to it, if you need to shoot the bad guy, you might need to shoot him a lot. And if there is one bad guy, there is another waiting somewhere because, say it with me, “Dirtbags run in packs.” So, let’s reload. Well, let’s practice reloading. This is dry practice. No live ammo anywhere in the room. Here is what you will need: a pistol, two magazines, one magazine pouch and at least one dummy round. The first thing you need to know about reloading is where and how to position your ammunition supply. You can, if you are unwise, carry your spare magazine in your back pocket — or your coat pocket or your vest pocket — but that would be wrong. Unless you have a magazine pouch specifically designed for your pocket (there are a couple out there), don’t carry a spare magazine in your pocket. Your magazine pouch should be situated on your belt on your weak-hand side, with the tips of the bullets in the magazine facing your belt buckle. For me, that is a given. Don’t argue. Where there is room for debate is the location of the magazine pouch on your weak side. Some people wear it just behind the seam of the trousers. Some people wear it just in front of the seam. The choice is yours. Find out what works, find out what is comfortable and then conduct your training drills with those two elements in mind. I have noticed if I put my magazine too far forward, it tends to get uncomfortable, so I push my magazine pouch just behind my trouser seam in what is basically the 8 o’clock position. Again, tips of the bullets should be pointing toward your belt buckle. This will become important as we conduct the drill. If your magazine pouch has a tension adjustment, set it so the magazine is held firmly (but not so tightly that you end up pulling your pants up as you pull the magazine out of the pouch). So, with your pouch in place, with your spare magazine with at least one dummy round in it and with the tips of the bullets pointing to your belt buckle, set up your training scenario. Let’s assume that during the course of your gunfight, you have run your gun dry — fired every round — and your slide has locked to the rear. This might not be the best situation, but let’s say it happened. Here is your sequence to correct that.
- Step 1: Get off the “X.” You should always be looking for and fighting from cover, but it is especially important when you have no ammo.
- Step 2: Bring the gun in close up in front of your face, rotating it just a bit. You want to be able to see the gun but also see the bad guy.
- Step 3: Reach with your support hand to retrieve your spare magazine. Get your thumb deeply between the magazine and your body and make sure your index finger is on the front of the magazine. Pull out the magazine and rotate your hand. If you have grabbed it correctly, the magazine should be instantly aligned and ready for insertion in your pistol. Your index finger on the front of the magazine helps you find the magazine well and eliminates fumbling.
- Step 4: As you bring your new magazine up to the pistol, hit the magazine release and drop the empty magazine. You should always have your fresh magazine in hand before you drop the empty magazine.
- Step 5: Briskly insert the fresh magazine and reach over the top of the slide. Grasp the slide firmly with all four fingers, yank it to the rear and let go.
Now you can get back into the fight. Remember: Slow is smooth, and smooth is fast. Run through these steps very slowly at first and then increase your speed. If you remove all the live ammo from the room, this is something you can train for right in your own home. There is one more thing to consider: If you don’t run your gun dry but you still do a speed reload, remember to rack your slide. Now, some of you might say, “Wait a minute, that means I’m tossing a live round out of the chamber!” That might well be true, but when you insert a fully charged magazine and rack the slide, you are unquestionably putting a live round into the chamber. And have you ever had a slide not lock open after the last round? You could possibly have an empty chamber in your pistol when you insert that new magazine. So, train yourself to rack the slide every time you insert a new magazine. You might lose one round, but you will always be certain your chamber is loaded.

